It’s a great day to do masonry on Long Island — give us a call.

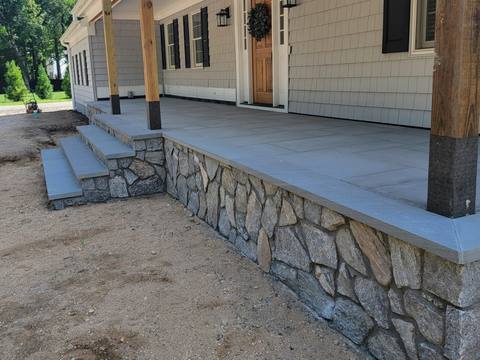
Brickwork & Stonework

Brick and stone installations, façades, and accents, finished with attention to detail.

What to know
  • Brick, natural stone, veneer
  • Marble, granite, bluestone, limestone, travertine
  • Mortar & joints that shed water
Popular brands we can work with
  • Glen-Gery
  • Belden
  • General Shale
  • Eldorado Stone
  • Cultured Stone
  • ProVia

Ask Mr. Hernandez what’s best for your project.

Natural stone sources we can work with
  • Polycorgranite · marble · limestone
  • Coldspringgranite
  • Rock of AgesBarre granite
  • Vermont Danbymarble
  • Indiana Limestone Co.limestone
  • Meshoppen StonePA bluestone
  • Endless MountainPA bluestone
  • Stoneline Grouptravertine
Explore service

Pools & Patios

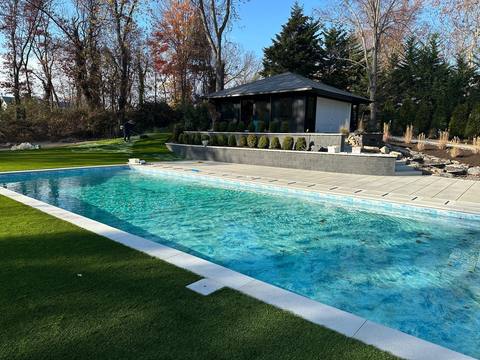
Pool coping, decks, and patios in travertine, natural stone, brick, and pavers.

What to know
  • Bullnose, square & rock-face coping
  • Typical 1¼"–2" thickness
  • Travertine, bluestone, porcelain
Plan now, swim by July

July and August go fast on Long Island. Plan with Mr. Hernandez from September, and work can begin in March as weather permits.

  1. Sep–FebPlan & design
  2. Mar–JunBuild (weather permitting)
  3. Jul–AugEnjoy
Explore service

Retaining Walls

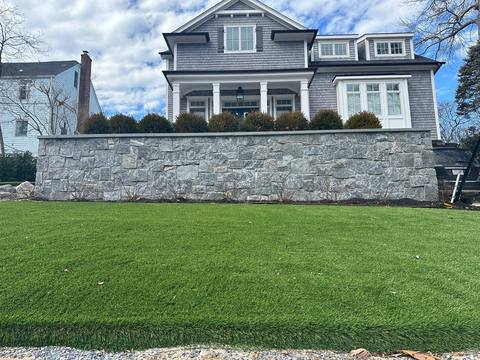
Erosion control and landscape walls for North Shore and South Shore properties.

What to know
  • Segmental block, natural stone, poured concrete
  • Gravel footing & drainage
  • Geogrid for taller walls
Strength guide
Two ways to build it
  • Segmental block wallPrefab decorative block, dry-stacked
  • Block wall + veneerConcrete block core, faced with stone or brick

Extra strength: in a block-core wall, steel rebar can be set into the cores, which are then grouted solid.

See the strength guide
Explore service

Paver Driveways

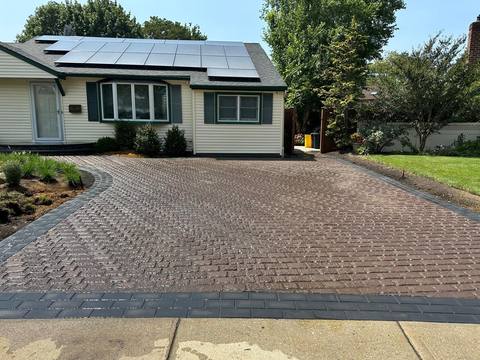
Paver driveways and patios built for Long Island weather.

What to know
  • Herringbone, basket-weave, running bond
  • Pavers, stone, cobblestone
  • Deeper base for driveways
Driveway types
  1. PaversRepairable; single units can be lifted and replaced.
  2. Poured concreteSmooth, clean, low-maintenance surface.
  3. Stamped concreteThe look of stone or brick in one pour.
  4. Exposed aggregateDecorative pebble finish with good traction.
  5. AsphaltQuick to install and usable soon after.
  6. Crushed stone / gravelDrains well and is budget-friendly.

Ask Mr. Hernandez which is right for your home.

Explore service

Hardscape

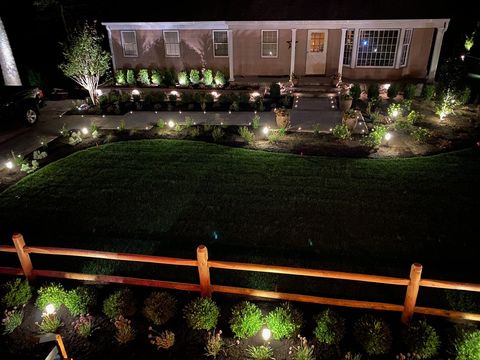
Walkways, steps, patios, seating walls, and fire pit surrounds built in pavers, brick, and natural stone.

What to know
  • Walkways, steps & stoops
  • Patios, seating walls & fire pit surrounds
  • Pavers, brick & natural stone
Explore service
How it works

From first call to finished project

  1. 1

    Request an estimate

    Fill out the estimate form, call, text, or email Mr. Hernandez.

    (631) 965-1754jnhmasonry@gmail.com

  2. 2

    Mr. Hernandez visits and quotes

    Mr. Hernandez meets with the homeowner, project manager, designer, or architect on site, looks at the job, and gives you a free estimate.

    On-site visit or plan review

    Helpful to have ready:

    • Photos of the area
    • Rough measurements
    • Plans or drawings, if any
    • HOA or town permit questions
  3. 3

    Work scheduled

    Once you approve the quote, your project goes on the schedule. Mr. Hernandez walks you through materials, timing, and prep, and keeps you updated until the job is done.

    1. Materials
    2. Site prep
    3. Build & clean-up
    Text Jose for an update
Best practices

Planning your project: best practices

Nine things to think through before you build — so your patio, pool deck, wall, or driveway looks right and lasts through Long Island winters.

  1. Step 1: Start with how you’ll use the space

    Think about who uses it and how: everyday foot traffic, outdoor furniture and a grill, a pool deck that stays wet, or a driveway that carries cars and delivery trucks. How you use it drives the size, layout, base, and material.

    TipMark the shape with a garden hose or marking paint and set your furniture inside it before deciding on size.

  2. Step 2: Set a realistic budget range & priorities

    Pick a range you’re comfortable with, then rank must-haves vs. nice-to-haves. A clear range helps Mr. Hernandez suggest materials and layouts that fit — and what could be added in a later phase.

    TipPut your money first into what’s hardest to redo later: the base, drainage, and structure.

  3. Step 3: Match the house style & existing materials

    Pull colors from your roof, siding, trim, or existing brick. Traditional homes often pair well with brick, bluestone, or tumbled pavers; modern homes with large-format pavers, porcelain, or clean-cut stone. Repeating one or two materials ties the property together.

    TipKeep a photo of the front of the house handy when you look at samples.

  4. Step 4: Choose materials for Long Island freeze-thaw

    Winters here bring repeated freezing and thawing, plus de-icing salt. Look for dense concrete pavers made for freeze-thaw, freeze-rated natural stone, and frost-resistant brick. Avoid soft or porous stone in splash and salt zones like pool coping, steps, and driveway aprons.

    AskAsk whether a stone or paver is rated for freeze-thaw before you fall in love with it.

  5. Step 5: Plan drainage & grading first

    Water is the biggest enemy of masonry. Patios and walkways should pitch away from the house, downspouts should discharge away from the new work, and retaining walls need gravel backfill and drainage behind them.

    TypicalA slope of about ¼″ per foot away from the house is common for patios and walks.

  6. Step 6: Check permits, HOA, property lines & utilities

    Rules vary by town and village. Ask your building department and HOA early, and know where your property lines and setbacks are — a survey helps. Taller walls (often around 4 ft and up) and work near property lines are the most likely to need a permit or engineering.

    Before you digCall 811 — in New York that’s Dig Safely New York — so underground utilities get marked. It’s free.

  7. Step 7: Think about edges, steps, lighting & add-ons

    Plan borders and edge restraints, comfortable steps with even risers, and where lighting will go. It’s much easier to run empty conduit for low-voltage lights — or a gas line for a future fire pit or outdoor kitchen, installed by a licensed pro — before the pavers go down.

    TipEven if you’re not adding lights or a fire pit now, a sleeve under the patio keeps the option open.

  8. Step 8: Gather photos, rough measurements & inspiration

    Take a wide shot and close-ups of the area, jot down rough length × width (and wall or step heights), and save a few pictures of styles you like — and ones you don’t. It makes the estimate faster and more accurate.

    TipText the photos to (631) 965-1754 so Mr. Hernandez can see the space before the visit.

  9. Step 9: Compare quotes apples-to-apples

    Make sure every quote covers the same things: excavation and base depth, the exact materials and thickness, drainage, edge restraint, permits, and cleanup and debris removal. A lower number can mean something was left out.

    TypicalCompacted gravel base is often about 4–6″ for patios and walks and about 8–12″ for driveways — it varies by soil and use.

Measurements shown are typical guidelines, not rules — every site is different. Mr. Hernandez will look at your property in person.

Ready to plan yours?

Text photos of the space to (631) 965-1754 — they help Mr. Hernandez understand your project before the free on-site estimate.

Get a Free Estimate Text photos
Service area

Serving Long Island’s North Shore & South Shore

Based in Bay Shore, serving homes from the North Shore to the South Shore. Not sure if we cover your town? Call (631) 965-1754.

North Shore South Shore
Based in Bay Shore, NY
Free estimate

Let’s start your project

Free on-site estimates from Mr. Hernandez. Call, text, or send the form — whichever is easiest for you.

Masonry audio
35%
0 dB
0 dB
Tap the hammer to play or mute